Backpacking is my favorite way to get outside. Backpacking gives you the opportunity to completely unplug, immerse yourself in nature, challenge yourself physically, and forget about the worries of everyday life.
If you’ve never been backpacking before, it’s likely one of these things that is inspiring you go on your first backpacking trip.
My first time backpacking was in 2005, and when I started backpacking, I made a lot of common backpacking mistakes. The weren’t a ton of backpacking 101 resources then, so it was trial by fire.
Since then, I’ve backpacked more than 1,000 miles on some of the most iconic and remote trails in the US, and I’ve accumulated all of the beginner backpacking tips I wish I knew when I was learning how to backpack.
So in this backpacking for beginner’s guide, I’m going to teach you the basics of how to start backpacking. You’ll learn all about everything involved with planning a backpacking trip like choosing a trail, the gear you need, backpacking food, safety, and more.
My goal is to help you feel more organized, confident, and less overwhelmed as you get ready for your backpacking adventure.
Choosing a Destination
Pick the dates for your backpacking trip
The dates for your backpacking trip will dictate where you can go due to the weather. Good weather makes backpacking much easier, and that’s what we are shooting for on your first backpacking trip.
Backpacking in the Summer: Typically, mid-July to late-September is ideal for planning a backpacking trip to the mountains. Too early in the summer or late in the fall, you may encounter snow, which poses challenges that you probably won’t be ready for as a beginner backpacker. Bugs are typically worse early in summer as well.
Backpacking in the Spring or Fall : If you want to go in spring or fall when the mountains aren’t an option, backpacking in the desert is a good choice. You should avoid the desert in summer due to scorching temperatures and lack of shade. If your first backpacking trip is to the desert, you’ll want to be especially aware of water availability.
Backpacking in Winter: There are very few places that you’ll be able to safely and comfortably backpack in the winter as a beginner. For that reason, I’d avoid winter and use that time to focus on getting in shape for backpacking (more on that later).
Once you’ve decided on the season you want to backpack in, you can narrow down the specific area you want to visit.
Hiking the West Rim Trail in Zion National Park in late Spring
Pick a Trail
As a beginner backpacker, plan a trip for 1-2 nights on an easy trail to get some good experience under your belt. Shorter, easier trips are a great way to get comfortable carrying your pack, setting up your gear, and learning the ropes without overextending yourself.
To find a trail, use one of the popular trail finder apps, read your favorite outdoor blogs, buy a trail book for the region you’re interested in, or do a google search for “best backpacking trails in ….”
Here are a few things you should look for when choosing a trail for your first time backpacking:
Distance: A good goal for beginner backpackers is 5-7 miles a day, especially if you aren’t used to carrying a lot of weight when you hike. Shorter distances will allow you time to stop and enjoy the scenery without feeling rushed or stressed. When I backpack, it takes me about 40 minutes on average to cover 1 mile, so it’s a lot slower than a normal waking pace. So a 7-mile day would require just over 4.5 hours of hiking.
Elevation Gain: For your first trip, I’d choose a trail with less than 500-1,000 feet of elevation gain per day, depending on how much hiking experience you have. That might not seem like a lot, but steep trails feel a lot harder with a heavier pack on.
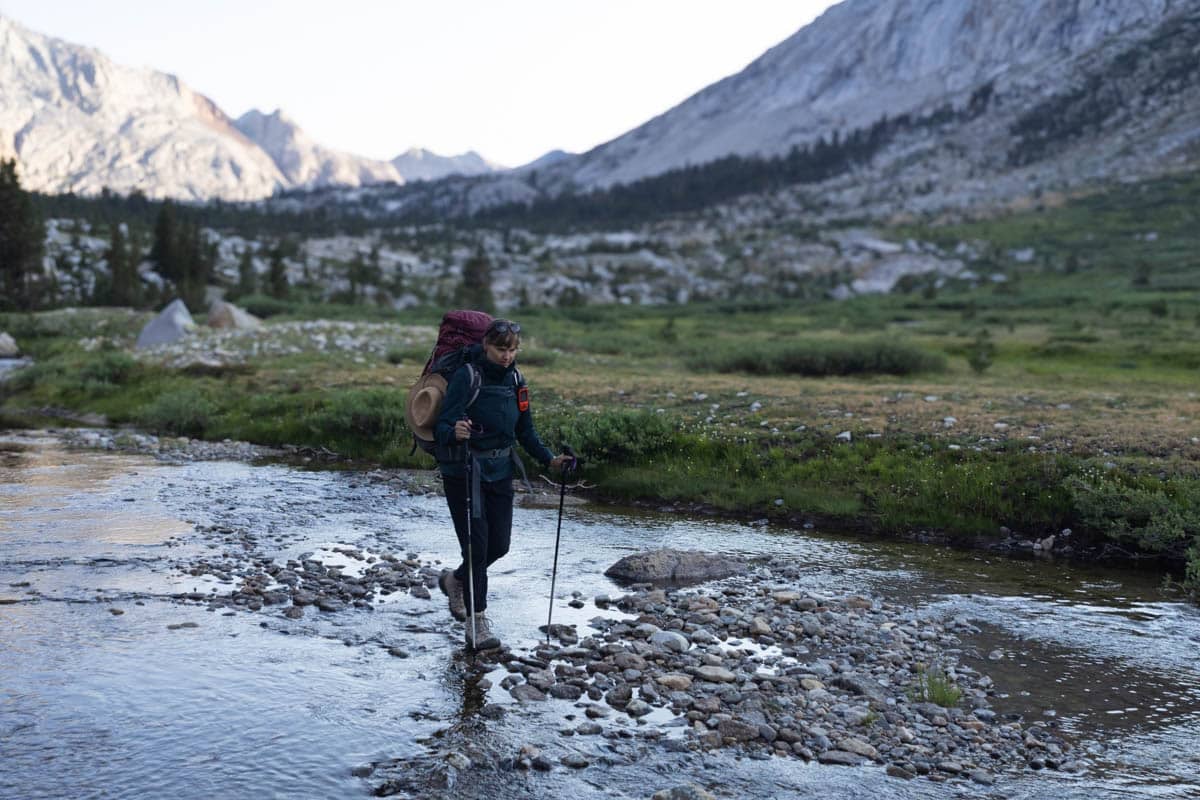
Terrain: Stick to well-marked, well-defined trails to minimize your chance of getting lost. There’s no need to be scrambling, route-finding, or boulder-hopping when you’re learning how to backpack. Also avoid trails with major river crossings.
Campsite Options: Ideally you want to choose a trail that offers campsites near a lake or stream. That way you don’t have to worry about water availability for drinking and cooking.
Dog-friendliness: Bringing a dog backpacking requires extra preparations. You’ll also be carrying more weight due to dog food and extra water. For that reason, I might suggest leaving your pup at home for your first backpacking trip. However, if you are set on bringing them, make sure the trail allows dogs and check out my tips for backpacking with a dog.
After you’ve chosen where and when you’re going backpacking, check to see if a permit is required.
Many trails, especially popular trails in National Parks, require wilderness permits that need to be reserved months in advance. If this is the case, it’s best to have some wiggle room in your trip dates in case your dates are already full.
In some cases, a number of permits are held on a first-come, first-serve basis but for popular trails and dates such as weekends, you’ll need to arrive before the ranger station opens and should have a backup plan in case you’re not able to get a permit.
Depending on where you are backpacking, your permit may have additional requirements. For instance, if you are traveling in bear country (Sierra Nevada, Montana, Wyoming, etc), you may be required to carry your food and scented items in a bear-proof container or bag. Or on popular trails, you might be required to pack out your poop in wag bags.
Transportation depends largely on what kind of trail you’re doing, and whether you are backpacking solo or going with a group. Look at a topographic map to find the trailhead and designated parking areas.
If you are hiking a loop trail or an out-and-back, you won’t need an additional car. However, if you’ve chosen to hike point-to-point, you’ll have to drop a second car off at the other end of the trail before beginning your hike or arrange for a shuttle service.
Backpacking gear can be expensive. If you’re committed and are confident this is going to be your first backpacking trip of many, I’d encourage you to invest in quality, lightweight gear from the get-go. Lighter gear is going to make your trip more enjoyable, and you’d hate to buy heavier gear only to replace it after a few trips.
Backpacking Essentials
The most important beginner backpacking tips tend to revolve around gear. It’s so easy to overpack and end up with a crazy heavy pack that leaves you wondering why on earth you decided to start backpacking. On the other hand, you also don’t want to forget any important backpacking essentials that can make or break your trip.
For a full run-down on the backpacking gear you need, start with my 3-day backpacking checklist. That list has the gear I actually use on every single trip and you can refer to it to make sure you don’t forget anything.
However, some of that gear I mention in that post is quite expensive for a beginner backpacker, so I’m recommending some more budget-friendly backpacking essentials here:
Backpacking Pack: A pack that doesn’t fit right can be really painful and ruin your adventure, so a properly-fitting backpack is critical for your first backpacking trip. A 50-60 liter pack should easily fit all of the gear you need for a 1-2 night trip, and is also big enough for longer trips down the road. I recommend the REI Flash 55 or the Deuter Aircontact packs, which are both budget-friendly.
Backpacking Tent: DO NOT bring your normal car camping tent. Car camping tents are a lot heavier than backpacking tents and will weigh you down. If you are backpacking with another person, you’ll want a 2-person tent that has a minimum trail weight (which includes the tent body, poles, and rainfly) of less than 4 pounds. Generally, the lighter the tent, the more expensive it will be (the same applies for most backpacking gear). The REI Half Dome SL2+ offers a good balance between weight and price.
Sleeping Pad: Now a sleeping pad is something you don’t want to skimp on. Your sleeping pad provides both cushion and insulation, and if you sleep horribly, you probably won’t want to backpack again. Avoid foam sleeping pads that offer very little cushion, and instead choose a lightweight inflatable sleeping pad. I personally used the Therm-a-Rest ProLite Plus for years. It’s not the lightest on the market, but I find it to be relatively comfortable at a lower price point.
Sleeping Bag: Down sleeping bags are lighter and offer more warmth for their weight than sleeping bags with synthetic insulation, and you should try to find a bag that weighs less than 3 pounds. Generally, a 15-degree bag should suffice for almost any summer backpacking trip, but as a rule of thumb, you should choose a temperature rating that’s at least 15 degrees colder than you expect the temperature to be at night. I usually use an Enlightened Equipment Quilt, because it’s light, comfortable, and compresses really small. For a more budget-friendly (but heavier) option, try the Kelty Cosmic 20.
Stove: Having a lightweight backpacking stove allows you to stay fueled with hot meals and beverages rather than subsisting on energy bars alone. It’s easiest to rely on backpacker meals instead of cooking from scratch. In that case, all you need to do in boil water, and the Jetboil stove is the easiest and most beginner-friendly to use.
Headlamp: A headlamp is a lot easier to use than a flashlight since it allows you to be hands-free.
Trekking Poles: Trekking poles are essential for beginner backpackers. It’s a great tool for staying balanced, taking pressure off your knees, and keeping a good pace on varied terrain. Plus, most are easily attached to your pack, so you can stash them when you need to. Need convincing? Here’s all the benefits of using trekking poles.
Water Filter: Drinking water straight from streams can give you giardia. Not a fun way to end your first backpacking trip! You should bring a water filter and make sure you know how to use it. For the easiest cheapest solution, bring some purification drops.
The 10 Essentials: The 10 Essentials are a tried and true list of the top ten things you’ll want to carry with you, covering everything from food and water to navigation tools, first aid, and other safety items.
For more recommendations and some of my favorite backpacking gear over the years, check out the posts below
What to do if you can’t afford new backpacking gear
If you simply can’t afford an entirely new backpacking kit, here are a few suggestions on how to acquire your backpacking gear without spending an arm and a leg:
Rent it: REI, local gear shops, and university recreation programs often rent backpacking gear. This is a great way to try it before committing
Borrow it: Got outdoorsy friends? See if they have some gear to lend you
Buy used: Check Facebook Marketplace, local used gear shops, ebay, or the used site called Gear Trade.
Buy on sale or at discounted retailers: Many outdoor retailers have big sales around Memorial Day, 4th of July, Labor Day, and Black Friday. If you know what you need ahead of time, you can wait and try to score things on sale. There are also some discount gear sites to check out.
What to wear backpacking looks a lot like what to wear hiking. For beginner backpackers, investing in a few good-quality basics that will last you a long time is key to being comfortable on the trail.
Here’s a few backpacking clothing tips for beginners:
Avoid Cotton: Cotton takes forever to dry and can get really smelly sweating in it day after day. It can also cause chafing and stretch out over time.
Cover up your skin: The more of your skin you cover up, the less sunscreen and bug spray you have to apply. Also, too much sun exposure can make you more prone to dehydration and heat exhaustion. I always wear a Buff around my neck and a sun hat too.
Bring versatile layers: You should bring pieces that you can layer while you’re hiking or at night at camp, so you don’t have to bring a bunch of separate outfits.
Prepare for unexpected weather: The weather can change quickly in the mountains, and even in the desert, nights can be chilly. You will want to pack a synethtic insulated jacket with a hood and rain gear. Make sure your rain jacket has pit zips too so it get good air flow in case you have to hike in it.
Wear wool socks: Cotton socks cause blisters. Darn Tough are my favorite hiking socks. They don’t shift around on your feet, and you can wear them for several days without them stinking.
Invest in quality hiking shoes: While many experienced backpackers will hike in trail runners, for first-time backpackers, I recommend a boot that offers mid to high ankle support, adequate cushion and is relatively light (you don’t need mountaineering boots which tend to be extra heavy). Having ankle support will provide more stability on rocky terrain, especially with a heavy load on your back. I personally wear Oboz Footwear. The Oboz Bridger Bdry Mid is extremely popular for backpacking.
Don’t overpack: Clothes are so easy to overpack and will quickly add weight to your load. For a 1-2 night trip, you only need 2 shirts, 1 shorts, 1 pants, 2 underwear, 2 socks, 1 mid-layer, 1 warm jacket, rain jacket, and rain pants.
Bring camp sandals: It’s so nice having a lightweight pair of sandals to change into at camp to let your feet air out. Choose a pair that you can wear socks with when it gets cold at night.
For a full list of the clothing I bring backpacking, see my 3-day backpacking checklist and the posts linked to below.
This is what I typically wear backpacking (swap shorts for pants when it’s cold)
Planning your food for a backpacking trip can be one of the most intimidating parts of planning. You burn a lot of calories walking for hours with a heavy load on your back, so having adequate food is critical. Eating frequently will keep your energy levels up and help you stay focused, alert, and aware.
Here are some tips to simplify your food planning:
Rely on backpacker meals: Backpacker meals are so easy to make in the backcountry. All you have to do is boil water, pour it in the pouch, and eat. When you’re done, lick your spork clean, seal the pouch and put it with the rest of your trash. I love that with these meals, there are no dishes to do. They are very light and offer a lot of calories in a small package. Plus, some of them actually taste pretty good! See my favorite backpacker meals for some ideas.
Lay out all of your food before you go: Before you go, gather all of your meals and snacks and organize it by day. You should have breakfast > snack(s) > lunch > snack(s) > dinner > sweet treat for each day of your trip. Spreading it all out helps you visualize whether you actually have enough.
Plan for 3,000-4,000 calories per day: How much you burn depends on a number of factors including the weight of your pack, how tough the hike is, your pace, and your body weight. But roughly the food you bring should amount to this many calories. It’s better to have a little extra than not enough!
Pack calorie-dense foods: Pack foods that have a high number of calories per ounce. Nuts, nut butters, trail mix, chocolate, energy bars, dried fruit, olive oil, oatmeal, etc. While I no longer do animal products myself, meat sticks and cheese are also calorie-dense foods for backing.
Below are some other blog posts I’ve written with some of my favorite, easy backpacking food ideas.
Preparing a boil-only backpacking meal on the Baron Lakes Trail in Idaho
Packing all of your backpacking gear in your backpack is a bit on an art, and you will get better at each morning. Ideally you want as much of your stuff to fit inside the pack as possible. Hanging stuff all over the outside can affect your balance. If you’re finding consistently unable to fit everything inside, it might be best to consider a larger backpack.
Here are some tips for loading up your pack:
Loosen all of the compression straps on the backpack
Put your sleeping bag in first
Fill the space around your sleeping bag with clothes you don’t need for the day
Next, put in your bear canister or food. This is typically the heaviest thing, and you want that weight centered on your back. Note: leave the food out that you plan to eat that day while you’re hiking. You’ll put this in the top of your pack (aka the brain) for easy access.
Stuff clothes and loose items around your food to keep in place
On top of your food, place your tent body and sleeping pad with the heavier items always going closer to the back of the pack and your body. You can leave your tent poles out and store them outside your pack in a side pocket or slide them down the inside of the pack next to your bear canister/food.
Add smaller items like your stove, sleeping pad, toiletries, etc. Play a bit of Tetris until you get everything organized.
Keep items like your water filter, first aid kit, map, rain jacket, extra layer, snacks and lunch, sunscreen, and bug spray at the top since you might need them during the day.
Clip your emergency communicator to the outside of your pack
Put your phone and lip balm in the hip pocket
Place water bottles in the side pockets
Cinch all of the compression straps down, and you’re ready to go!
Keeping stuff inside your pack will keep your load streamlined and centered on your body
Backpacking Safety
Staying safe while backpacking requires taking proper precautions and using good judgment. Here are a few things to keep in mind while you’re backpacking. Visit my post on hiking safety tips for more detailed advice.
Stay hydrated: Don’t wait until you feel thirsty to start drinking. You should be drinking water frequently throughout the day. I also like to take electrolytes when I’m backpacking to replace the salt, potassium, and magnesium that I lose through sweat. To make sure you avoid dehydration, see my tips for staying hydrated on the trail.
Be wildlife aware: Look up the local wildlife before you go so you know what to do if you encounter an animal. To avoid attracting bears and other critters, store your food and scented toiletries in a bearproof container and place that at least 100 feet downwind from your tent at night. Do not sleep with food or other scented products in your tent! In grizzly country, you should also always carry bear spray.
Don’t get lost: Don’t rely solely on your phone for navigation since it will likely run out of battery. A paper map and compass is always best with your phone or a GPS as a backup. Make sure you know how to read a topo map before you go.
Carry an emergency communication device: I ALWAYS carry a Garmin inReach with me when I’m backpacking. This little device is an investment, but it can be a lifesaver in case of an emergency. You can use it to send and receive texts when you have no cell service, and there is a SOS button you can press if you need to be rescued.
Tell someone your plans: Always tell someone your plans. This should include your route and the day and time you plan to be off the trail.
Pack a first aid kit: A small backpacker first aid kit probably won’t save your life, but it can help prevent minor cuts, blisters, and injuries from becoming more serious.
The Garmin is an easy way to check in with family and let them know you’re ok
Backpacking Hygiene
As a beginner backpacker, you may wonder how to maintain your hygiene while you’re backpacking. Luckily it’s not that hard, but I have a few tricks to share that I wish I knew when I first started backpacking.
Ladies, use a pee rag: A pee rag is a reusable cloth that you can use to wipe after you pee. It’s infinitely better than drip drying and will keep you feeling so much cleaner on a multiday backpacking trip. After you use it, you rinse it off, and hang it to the outside of your pack to dry.
Use hand sanitizer: Pack some hand sanitizer to clean your hands after going to the bathroom and before eating.
Take a dip: There is nothing like swimming in a backcountry lake or soaking in an icy river. It’s also an opportunity to rinse off. Just don’t use soap, even if it’s biodegradable, as it can have harmful affects on the aquatic environment.
Swap out your underwear: Every night when you get to camp, swap out your underwear. Take off the pair you are wearing, rinse it in a creek, and then hang it to dry.
Consider bringing a bidet: Portable bidets for backpacking are all the rage! It allows you to quickly rinse off your butt and nether parts after going to the bathroom and reduces the amount of toilet paper you need
Dealing with your period: Being on your period while backpacking sucks. There’s no way around it. Many women like to use a menstrual cup since you don’t have to worry about packing enough supplies. I find the cups messy (you also have to dig a cathole to dump it) and would rather just deal with tampons. The only issue with tampons is you have to pack them out and since they have a scent, you should store any used tampons with the rest of your food at night.
Pack a couple of body wipes: If you really want to clean up, the easiest way is with a body wipe. To cut down on weight, you can just pack the number you need in a ziplock bag.
How to Leave No Trace While Backpacking
This backpacking for beginners crash course wouldn’t be complete without talking about Leave No Trace. Leave No Trace is a set of principles designed to guide our actions in the outdoors into order to reduce our impact.
Going to the bathroom: Always go to the bathroom at least 100 feet from a water source. You wouldn’t want someone pooping right next to the lake you plan to swim in and filter water from right? Try to pee on bare dirt instead of vegetation. For pooping on your backpacking trip, dig a cathole that is at least 6-8″ deep, poop in the hole, cover it up, and pack out your toilet paper. Do not bury your toilet paper, as it can be dug up by animals and takes a while to decompose.
Choosing a campsite: Follow local regulations about where to camp. If there are no regulations, then choose a campsite that is 200 feet from the water. Set up your tent on bare dirt or rocks and avoid setting it up on sensitive vegetation. Try to find a campsite that looks like it’s been used by other campers rather than creating a new campsite.
Campfire safety: A staggering number of wildfires are human-caused, and I’m so scared of the risks that I rarely have a campfire these days. If you do decide to have a campfire, make sure you follow campfire safety protocols and drench it with water so its cold to the touch before you go to bed.
Pack out all of your trash: This includes used toilet paper, wipes, apple cores. Anything that you brought in should be packed out and disposed off properly once you’re back to your car. I like to bring a gallon ziplock to carry all of my food trash and another small ziplock for my used toilet paper.
Don’t use soap in streams: If you do bring biodegradable soap for washing up, go 200 feet from the water in order to use it. You can use the water in your water bottle to rinse the soap off.
Don’t leave food out: Have you heard “a fed bear is a dead bear”? Once bears get a taste of human food, they want more (just like your dog) and can become aggressive in their efforts to get it. When that happens, a bear may have to be euthanized. Also, other animals are attracted to your food and will eat it, making a mess of your campsite.
Also, take the time to familiarize yourself with the unspoken rules of proper trail etiquette. In a nutshell, be kind to other hikers, the uphill hiker has the right of way, and be mindful of how your actions are affecting others who are trying to enjoy their time in the wilderness.
This is someone else’s tent we came across in Idaho that is a clear violation of Leave No Trace, as well as permit regulations. The general rule is to camp 200 feet from water to minimize your impact.
When getting started with backpacking, I recommend choosing trails and trips that are in line with your current fitness levels. Just like hiking, backpacking is a great way to kick-start your exercise routine and get in shape, but trying to tackle a super challenging trail might not be fun and could discourage you from going again.
Prior to your first multi-day trip, doing some physical preparation and establishing a healthy awareness of your capabilities will help grow your confidence as a first-time backpacker.
Training and stretching
The best way to get in shape for backpacking is to get moving. I recommend going for as many local hikes and walks around your neighborhood as you can. Load up your pack with some weight so you can prepare your body for carrying a heavier load than you are used to.
Train for hiking as you’d train for a 5K run, by creating a plan that starts slow while ramping up your distance and intensity as you progress.
Be sure to work a few gentle stretches and exercises into your normal routine to help build the strength you need to successfully hike with a backpacking pack.
Remember to always listen to your body and any pain signals, as this can be great training for knowing when to push yourself or call it a day on bigger and more challenging backpacking trips.
Dealing with aches and pains
Backpacking is hard work, and it can leave your body and joints tired and achy. If you have weak knees or sensitive feet, there are proactive steps you can take to prevent multi-day hikes from taking a big toll on your body.
Another thing that used to bother me when I was a beginner hiker and first getting into backpacking was I’d always be so out of breath on the trail. I felt embarrassed, and it prevented me from hiking with people who I knew were in better shape than me.
Twenty years later, I still get out of breath very easily, even at my peak fitness levels. The point is for many people, getting out of breath is completely normal, but if it bothers you or you find it uncomfortable, check out these simple exercises and steps you can take to improve your lung capacity.
I hope this backpacking for beginners guide gives you the information you need to plan your first backpacking trip. Got any questions? Leave a comment below!


3xw20o